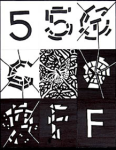
Assignment:
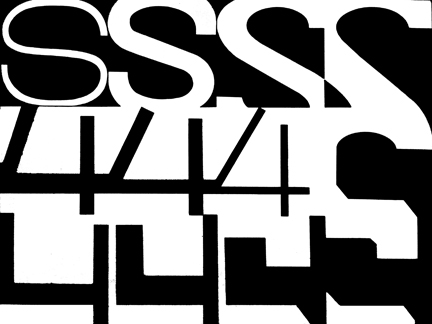
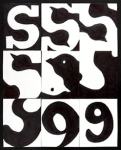
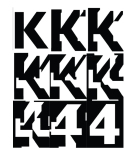
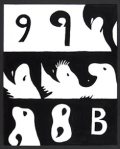
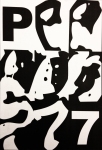
Your task is to morph the figure and ground relationship from Clear Figure on Ground through 3 stages of Figure Becoming Ground to Figure and Ground Reversal, another 3 stages of Figure Becoming Ground, and finally to Clear Figure on Ground again. Create visually even, progressive changes between each step.
Essentially, you are telling a story. In fact, you are always telling a story of some kind. The story here is starts with a figure shape that is clearly recognizable and nameable. That figure is what gradually changes—logically and sequentially—to a halfway point in the story where both itself and the ground surrounding it are equally visually important—neither is more nameable. Then, from this middle step, the story continues morphing with the ground now becoming sequentially more important. Finally, the story ends in the last step with a clear figure that is the opposite color of the very first step—a figure ground reversal.
First it is important to realize the fact that there cannot be a figure without ground. So, there is always some visual relationship between the figure and the ground.
The three possible versions of the visual relationship between the figure and ground are:
1. clear figure on ground—may be described as generally having all or most of the following characteristics:
- it is possible to name the shape (ie. 4 or S or square or triangle, or house, etc.)
- it is the most understandable version but also the least visually interesting.
- absolutely no ambiguity
- central within the ground (centered)
- it is a completely closed shape (not cropped)
- primarily convex
- if colored, is usually warm in color
- textural, patterned, or detailed
- is vertically oriented
- object-like
- regular shapes
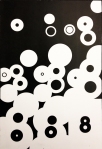
2. figure becoming ground examples (mostly identified by the use of implied line)—may be described as generally having all or most of the following characteristics:
- usually makes use of implied line in some way
- varying degree of visual ambiguity
- some parts of the ground contain elements of figure (see above)
- light color nuance
- some shared elements
- illusion of transparency
- coincident line
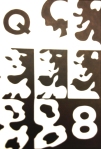
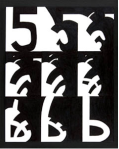
3. figure/ground reversal examples (mostly identified by the use of shared contour)—may be described as generally having all or most of the following characteristics:
- shared contour, shared or adjacent edges
- varying degree of visual ambiguity
- tends to become an overall flat pattern
- sequential alternating of attention
- heightened sense of visual tension
- both are equally namable shapes
- MC Escher-like tessellation pattern
- optical illusion
Process:
Create a grid of nine rectangles, each 2 x 3 inches in size. (they may be either vertical or horizontal)
Pick a letter from a real (not made up) typeface as step one. This letter will be a clear black figure on white ground. Then move to your last rectangle, step 9, and pick a numeral from the same typeface making it a clear white figure on black ground (the reverse of step 1). Then move to the middle step, #5, and create a fig/grnd reversal there. (this step will have characteristics similar to a Yin/Yang design and make use of shared contour). The final part of the assignment is to create the transitional steps at #’s 2, 3, 4, 6, 7, and 8 that will be examples of figure becoming ground, each at various amounts, as each step progressively morphs to the reversal step in the middle of the overall grid design. Draw all the steps using black sharpie markers. You will not be able to perceive the figure and ground relationships clearly if you use pencil.
Your design should be arranged like this (it may be either horizontal or vertical);
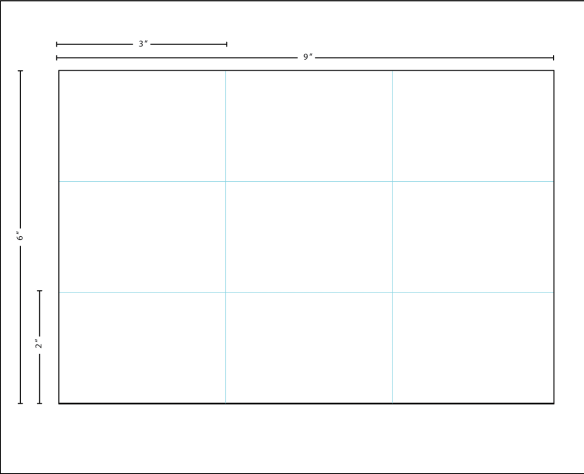
Your key to success with this assignment is an understanding of the difference between simply morphing a shape from one thing to another and the more complex situation where, in addition to a shape morphing, there is also a gradual change in the way that the black and white areas of the design are perceived. The figure is first perceived as being strong, but step by step becomes progressively weaker while the ground is progressively activated at the same time. Gradually, they reverse one another in the way we perceive them. Do not draw the lines between each rectangle.
To help you regulate the even speed or change from one step to another throughout the entire morph, cut out each individual rough marker drawing so that you can place the series in one line. Do this to compare evenness. Then, place step 1 next to step 9, 2 next to step 8, 3 next to step 7 and so on. In this way you can compare the figure/ground relationships. They should be the same for each of these pairings.
Finally, consider the entire composition as a whole—a complete Gestalt. The viewer should first see the entire 9 rectangles as one complete whole design or picture.
Craftsmanship:
As with all assignments, your ability to execute your final design with care, neatness and precision is essential. Maintain very high standards for yourself in this area. We will do this final step by scanning/photographing your marker sketch and placing it into Illustrator. Put it in a template layer of Illustrator and essentially trace it using Illustrator’s drawing tools. The goal is to “sharpen up” the drawing but you should still one open to making slight changes or modifications in the design to improve the figure and ground transitions.
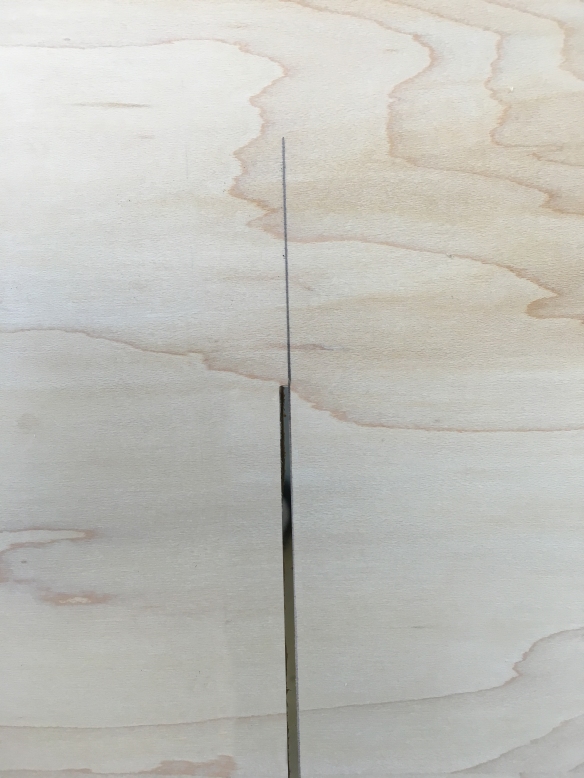
As an example of precision look closely at the following image. It shows a piece of wood being cut by a saw blade following a pencil line. Notice that the saw does not cut down the center of the line, but rather on one side of that pencil line. In fact, it leaves the pencil line on the wood after it is cut! This is because the saw blade has a thickness, and when it cuts creates a thin space called a kerf. This is similar to the fact that a pencil line will also have a thickness determined by the relative sharpness of the pencil being used. In the case of the kerf, the saw blade cuts the wood on the waste side. If we were coloring in a shape first outlined by a pen we would do a similar thing. We would take into account the thickness of the pen being used and draw the outline so the outer edge of the inked line would define the precise dimensions of the shape. This would result in a more precise shape and be an example of the level of craftsmanship you should strive for throughout all aspects of your final design.
Trace your drawing in Adobe Illustrator to help you maximize precision for the final version of your design. Follow these steps To do so:
- take an accurate picture of your marker drawing by using the copy stand (located along the north wall behind the large gray cabinets in the back of the studio).
- Open Adobe illustrator and create an artboard that is 6″ x 9″.
- Open the layers window and add a new template layer.
- Import that picture into Adobe Illustrator by using the PLACE command to put it into the Template layer you just created.
- Lock the Template layer
- Create a new layer if necessary and make sure it is above the template layer. This is your drawing layer
- Using Illustrator’s drawing tools, trace your marker drawing.
- When finished, save your file as an ai file and also expert it as a JPEG file.
TIPS FOR USING ILLUSTRATOR
- Basic Drawing with Vector Points and Bezier Handles
- Filling Shapes and Borders, Color
- Illustrator Tools
- Illustrator Tips and Tools
- Pen Tool
UPLOAD your final JPEG version of your drawing to the appropriate course Canvas assignment page.

